
How to Curl Your Wig | Daniel Alain
Divide the Hair Into Sections
Just like when you're straightening your wig, you'll want to start by dividing your hair into sections. To make it easier to curl the underneath layers, clip each section to the top of your head. This will help keep your hair out of the way as you work.
The number of sections you do will depend on how big or small you want your curls to be. For tighter, more uniform curls, start with smaller sections. You can use larger sections if you want looser, more beachy waves.
Keep the Temperature Low
When curling your wig, it's important to keep the temperature on your curling iron low to avoid damaging the hair fibers. Don't go above 300 degrees Fahrenheit, and try to stay closer to 250 if you can.
Wrap Each Section Around the Barrel
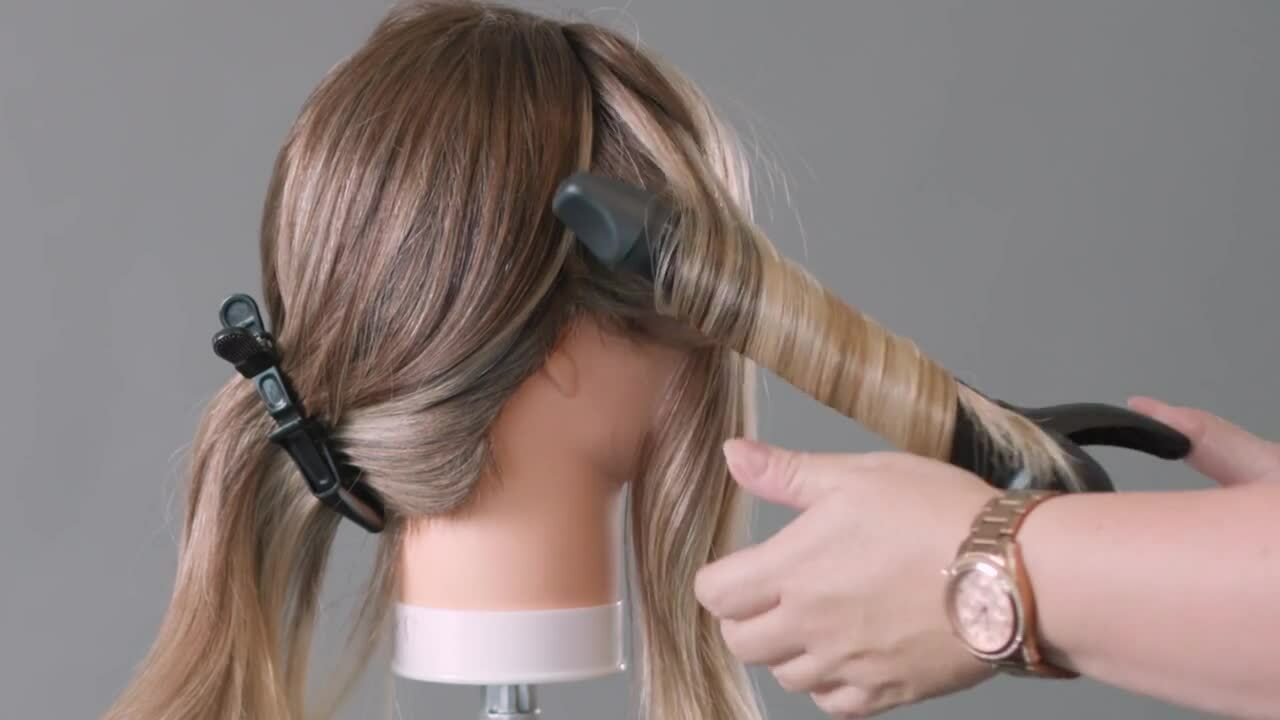
Once your sections are ready, it's time to start curling! Take each section of hair and wrap it tightly around the barrel of your curling iron. Make sure you hold the ends in place so they don't get caught under the clamp.
Depending on how tight or loose you want your curls, you'll need to leave them in for different amounts of time. For tighter ringlets, leave them in for 10-15 seconds. If you want looser waves, you can leave them in for 5-7 seconds.
Once you've curled a section, hold it in your hand to let the curl cool for a few minutes before styling. This will help the curls set and hold better.
Finish With Hairspray
To keep your curls looking their best, finish with a light layer of wig-friendly hairspray. You can also use a curl-defining product to help give your curls some extra hold and definition—just make sure you wash your wig regularly to avoid build-up.
Just like when you're straightening your wig, you'll want to start by dividing your hair into sections. To make it easier to curl the underneath layers, clip each section to the top of your head. This will help keep your hair out of the way as you work.
The number of sections you do will depend on how big or small you want your curls to be. For tighter, more uniform curls, start with smaller sections. You can use larger sections if you want looser, more beachy waves.
Keep the Temperature Low
When curling your wig, it's important to keep the temperature on your curling iron low to avoid damaging the hair fibers. Don't go above 300 degrees Fahrenheit, and try to stay closer to 250 if you can.
Wrap Each Section Around the Barrel
Once your sections are ready, it's time to start curling! Take each section of hair and wrap it tightly around the barrel of your curling iron. Make sure you hold the ends in place so they don't get caught under the clamp.
Depending on how tight or loose you want your curls, you'll need to leave them in for different amounts of time. For tighter ringlets, leave them in for 10-15 seconds. If you want looser waves, you can leave them in for 5-7 seconds.
Once you've curled a section, hold it in your hand to let the curl cool for a few minutes before styling. This will help the curls set and hold better.
Finish With Hairspray
To keep your curls looking their best, finish with a light layer of wig-friendly hairspray. You can also use a curl-defining product to help give your curls some extra hold and definition—just make sure you wash your wig regularly to avoid build-up.